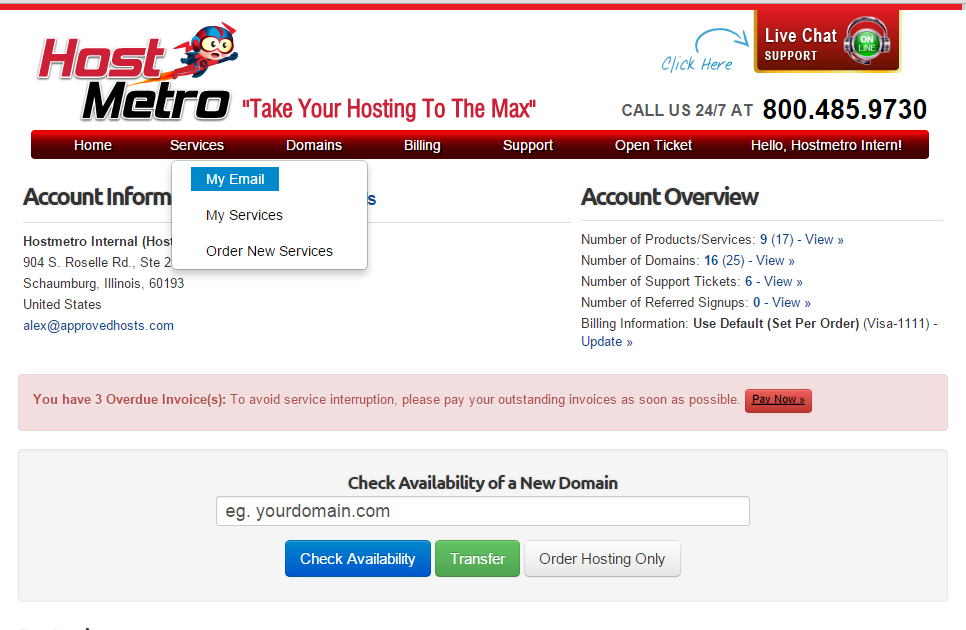
In order to use an email account you, of course, have to create it first! In order to create email addresses to use with the MetroMail secure servers you will first need to login to your account dashboard at https://www.HostMetro.com/login. After logging in you will be taken to the home page of your accound dashboard, which will look something like this.
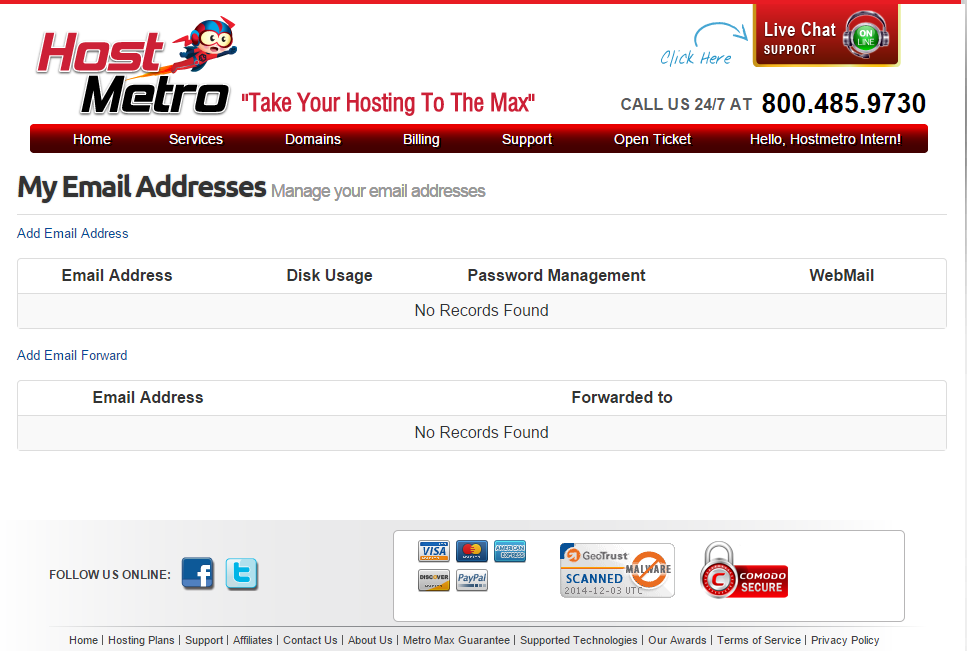
In order to access the section to control your secure email settings, simply click on "Services" and choose "My Email" from the dropdown menu. This will take you to a page that shows a list of email addresses you currently have, a list of forwarders you have, as well as the ability to create new addresses and forwarders. The page will look like this.
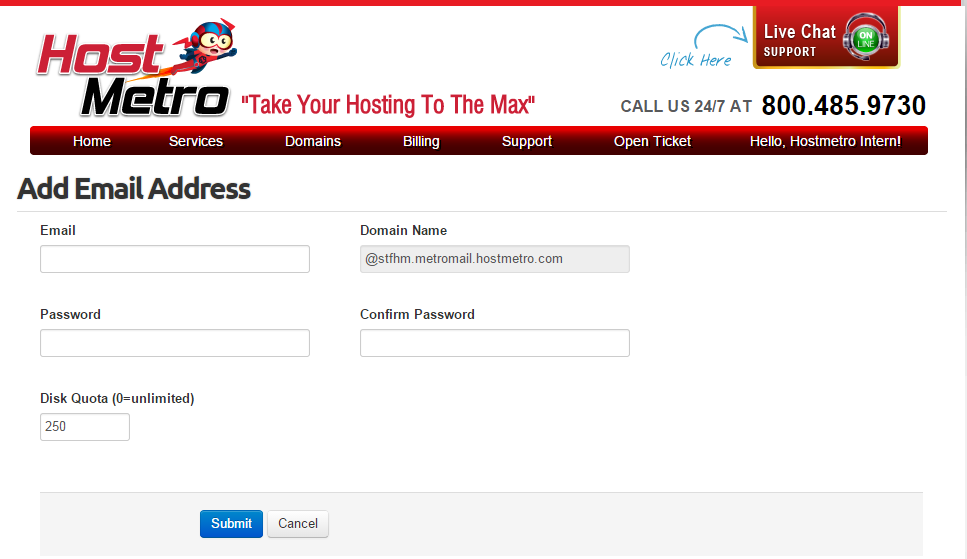
In order to create a new email address, simply click on the icon for "Add Email Address" which will take you to the page to create the email account. On this page you will see 4 fields to fill in.
1. Email - this is where you type in the email address you are creating. Leave off the @domain.com portion, as that is automatically added as you can see by the greyed out Domain Name field.
2. Password - this is where you choose a password for this email address.
3. Confirm Password - type in the password again
4. Disk Quota - this is where you choose the size of the email account. The default size is 250MB. We suggest leaving it at this. It can always be updated later if you are running out of space, but considering the average size of an email is 75kb that gives you room for over 3,000 emails.
After you have filled out all of the fields hit submit and the email address will be created. That's all there is to it! Next, it's time to log in to your webmail so you can use it.

